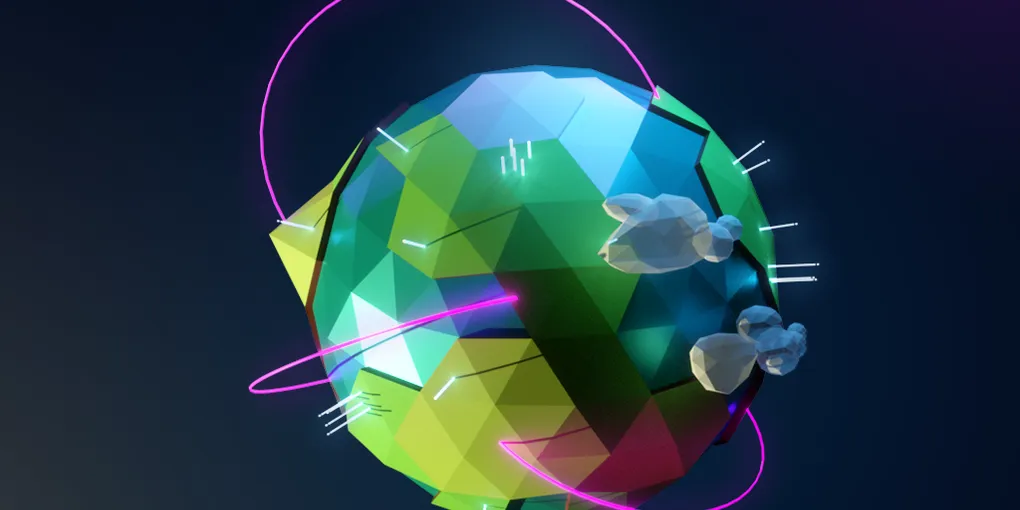
Recreating GitHub's Globe
Hey there! I am not affiliated with GitHub. This was a fun project that I created from being inspired by reading GitHub’s blog post series on their homepage redesign.
WebGL only draws points, lines, and triangles. Everything else is up to the developer. This is where Three.js comes in. It takes the basics of WebGL and creates a higher-level library for developers.
I was experimenting with Three.js when I stumbled on GitHub’s blog post series on their homepage redesign. I thought recreating the globe would be a fun and challenging project. They do share some details of how their globe was built. I did my best to fill in the blanks.
My globe doesn’t have all the features as the GitHub globe. My goal was to capture the visual essence of the globe. At a later time I would like to review the performance optimizations from their third blog post and optimize my globe.
Scene setup
To start, I needed to setup the scene. I won’t share the details of how I did this given there’s nothing unintuitive in my approach to scene setup. If you’re new to Three.js, I’d recommend starting with the creating a scene page on their docs.
The initial globe layer and lighting was the first challenge in capturing the essence of the globe. I spent a lot of time moving the lights around and changing the color and brightness values until I was happy with the results. I ended up with three lights in the scene: A light-blue key light to illuminate a majority of the globe, a lighter blue light for the highlighted upper-left edge, and a purple light for the right side of the globe.
//SETUP lights
var light1 = new THREE.PointLight(0x5a54ff, 0.75);
light1.position.set(-150, 150, -50);

var light2 = new THREE.PointLight(0x4158f6, 0.75);
light2.position.set(-400, 200, 150);

var light3 = new THREE.PointLight(0x803bff, 0.7);
light3.position.set(100, 250, -100);

scene.add(light1, light2, light3);
And here are the results …
Atmosphere
The atmosphere was probably the hardest part to recreate. On GitHub’s post they mentioned using a slightly offset sphere with a custom shader to get the atmospheric effect. I’ve never created a custom shader in three.js so it took some time to figure that out and get it looking right.
Atmosphere shader
const atmosphereShader = {
  'atmosphere': {
    uniforms: {},
    vertexShader: [
      'varying vec3 vNormal;',
      'void main() {',
      'vNormal = normalize( normalMatrix * normal );',
      'gl_Position = projectionMatrix * modelViewMatrix * vec4( position, 1.0 );',
      '}'
    ].join('\n'),
    fragmentShader: [
      'varying vec3 vNormal;',
      'void main() {',
      'float intensity = pow( 0.99 - dot( vNormal, vec3( 0, 0, 1.0 ) ), 6.0 );',
      'gl_FragColor = vec4( .28, .48, 1.0, 1.0 ) * intensity;',
      '}'
    ].join('\n')
  }
}
Atmosphere mesh
Then I added the shader to a ShaderMaterial and applied that to a slightly offset and slightly larger SphereGeometry.
const sphereGeometry = new THREE.SphereGeometry(2, 64, 64);
const sphereMaterial = new THREE.MeshLambertMaterial({
  color: 0xeeeeee
});
const sphere = new THREE.Mesh(sphereGeometry, sphereMaterial);
sphere.castShadow = true;
sphere.receiveShadow = true;
scene.add(sphere);
Land overlay and blue spires
In their blogpost, GitHub shares how they render the regions of Earth starting with the south pole and distributing circle meshes along the circumference of each latitude line.
I took a shortcut here and found a texture to overlay the base sphere. I created another sphere and loaded the texture as a material onto it. I make that sphere slightly larger than the base globe sphere, enable transparency on the material, then add it to the scene

//setup map overlay
const loader = new THREE.TextureLoader();
const overlayMaterial = new THREE.MeshBasicMaterial({
  map: loader.load('https://i.imgur.com/JLFp6Ws.png'),
  transparent: true
});

const overlaySphereGeometry = new THREE.SphereGeometry(2.003, 64, 64);
const overlaySphere = new THREE.Mesh(overlaySphereGeometry, overlayMaterial);
overlaySphere.castShadow = true;
overlaySphere.receiveShadow = true;
scene.add(overlaySphere);
GitHub’s globe uses the blue spires to represent geographical locations of pull requests. As stated before, my goal was just to capture the visual essence of the globe.
const cylinderGeometry = new THREE.CylinderGeometry(.01, .01, 4.25, 32);
const cylinderMaterial = new THREE.MeshBasicMaterial({
  color: 0x00ddff,
  transparent: true,
  opacity: .5
});
I used CylinderGeometry for the spires with a slightly transparent blue MeshBasicMaterial. I then added several cylinders to the scene. I started by moving them randomly around the globe then nudged their position slightly. Instead of trying to figure out the tangential point for each surface point of the globe, I made each spire sit in the middle of the globe and extended it so it stuck out of both sides of the globe. As such, some spires sit in the Indian Ocean.
Pink arcs
The pink arcs were an important part of the GitHub globe. GitHub shared some details of how they created and animated these arcs. I used that as reference to create static animated arcs.
For the animation of the arcs, the key from their blogpost was using the setDrawRange() function on BufferGeometry.
Unlike GitHub’s globe, I don’t change the arc height depending on the distance between the two points. Like the blue spires, I created and animated a single arc then duplicated it several times and manually moved it around the globe.
Using the QuadraticBezierCurve3 and applying it to a Tube Geometry and painting it pink with a MeshBasicMaterial, I was able to get a semi-accurate recreation of the pink arc.
Here’s the setup for that along with the creation and rendering of one of the tubes.
//set up bezier curves
var numPoints = 100;
var start = new THREE.Vector3(0, 1.5, 1.3);
var middle = new THREE.Vector3(.6, .6, 3.2);
var end = new THREE.Vector3(1.5, -1, .8);

var curveQuad = new THREE.QuadraticBezierCurve3(start, middle, end);

var tube1 = new THREE.TubeGeometry(curveQuad, numPoints, 0.01, 20, false);
const tubeMaterial = new THREE.MeshBasicMaterial({
  color: 0xd965fa
});
tube1.setDrawRange(0, 10000);
var curveMesh1 = new THREE.Mesh(tube1, tubeMaterial);
scene.add(curveMesh1);
And the result.
Final touches and animation
For the final touches I wanted to animate the arcs, spin the globe, and allow the user to drag the globe. These little interactions and animations go a long way in capturing the essence of the globe.
Spinning the globe was pretty simple. As part of the animate() loop, I simply rotated the sphere by .0005 units along the y-axis.
sphere.rotation.y += 0.0005;
You may have noticed I used the sphere.add method instead of the scene.add method for each of the objects. This applies each object as a child of the base sphere so the location and rotation value is automatically applied to those objects as the base sphere rotates.
Finally, to get the drag to work, I wrote a small script to listen to mouse events.
var isDragging = false;
var previousMousePosition = {
  x: 0,
  y: 0
};
$("#globeCanvas").on('mousedown', function(e) {
    isDragging = true;
  })
  .on('mousemove', function(e) {
    console.log("hi");
    var deltaMove = {
      x: e.offsetX - previousMousePosition.x
    };

    if (isDragging) {
      sphere.rotation.y += deltaMove.x * .004;
    }

    previousMousePosition = {
      x: e.offsetX,
      y: e.offsetY
    };
  });


$(document).mouseup(function() {
  isDragging = false;
});

$("#canvas").mouseout(function() {
  isDragging = false;
});
Then in the animate function I wrap the sphere.rotation line from above to check if the isDragging boolean is true to stop the globe from spinning if the user is dragging it.
if (!isDragging) {
  sphere.rotation.y += 0.0005;
}
Here are the final results. Check it out, in full, on CodePen.
Please be sure to check out GitHub’s five-part series on their homepage design. There’s a lot to read there and I hope you find the motivation and inspiration it gave me to make and learn something new.